Arriving at Defera
Once you have beamed down to the invasion zone, you are greeted by 4 different mission givers. Each of the have several missions that they can offer you. As you have three hours to do the missions, you might have to be choosy about which ones to do. The mission givers are:
- Captain Kuzmina
- Kranek
- Railuk
- Jula
Captain Kuzmina
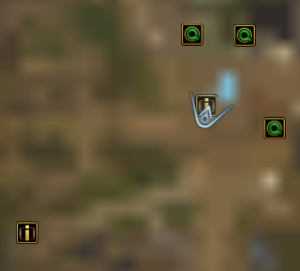
The captain is located in the middle of the beam down site. The missions provided are zonewide which means that you can accomplish them while anywhere in the zone.
Culling the Collective
This is a simple point and shoot kind of mission, just kill any 50 Borg. Remember to replicate a frequency remodulator as you will need it. The Borg adapt to your weapons quickly.
Blow Back
You must go to different areas in the zone to plant unstable matrices. These devices are supposed to do damage to the Borg. Don’t forget to ask for the devices, otherwise you will not be able to plant them. They look like a typical spatial charge and are scattered throughout all the different areas.
Prolific Producer
A crafting mission, as you explore the area killing Borg you will pick up various items along the way. All of these items are Borg related. You can use these items to craft things like the Disruptor Pulsewave Assault Mk II which is used for this mission.
To do the crafting there is a researcher located at the bottom left of the image showing Captain Kuzmina’s location. To create a rifle required 140 general research skill, 7 fibro-neural interface cabling, 2 cybernetic armature, and 2 nanopower capacitor.
After the full three hours of the event I had collected only 9 nanopower capacitor, 13 cybernetic armature, and 17 fibro-neural interface cabling. This presents a problem as they wanted 5 of the Disruptor rifles. My suggestion on this is to store up the components from a couple of runs before attempting the fabrication mission.
Kranek
Kranek offers two easy missions. These missions can be completed by a single player. They are based around the city and can be reached by using the transporter pad to his left. Optionally, you can run through the wall just behind the transporter pad.
City: Automated Aggression
The Borg adapt to any weapon very quickly. Your mission is to upload re-modulation software into six of the city turrets. The best way to do this is to find a turret that needs new software, kill the two Borg in front of it then do the modulation. Otherwise, you can get interrupted and have to do it a second time. This is definitely the easier of the two missions.
City: Modus Operandi
Borg cortical arrays can be used to determine the last commands sent to a drone. This will allow our troops to better defend against the Borg. Your mission is to collect 50 of them.
This is very monotonous not to mention just plain out right difficult. First, only Borg that you or a turret shoot first will drop anything for you. Second, they don’t always drop anything. Third, when they do drop an item it can be just about anything. About 50 percent or so was the average for the cortical arrays. Definitely a time sink and a half. It took almost an hour to get the arrays. My suggestion is unless you are one of those people who likes to bang their head against a wall, by all means skip this one.
Railuk
Railuk offers two easy missions. These missions are based in the power plant however. The transporter pad is to the right of Railuk. Unlike the city missions the pad is definitely the fastest way there. Both of these missions are inside the power plant itself. This is a closed in area and if you happen to be in an instance with a lot of people in it you can expect Borg running all over the place. Because you are doing the easy missions remember to choose the first level of the power plant.
Power Plant: Cooler Heads
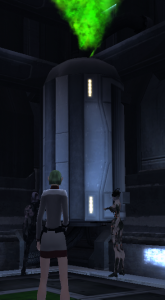
The mission: stop the Borg from venting coolant in the power plant. Scattered through out the power plant are coolant towers. They look like the one on the right. Each tower is guarded by two Borg. I know this is probably redundant at this point but remember to kill these two Borg before attempting to stop the leak. If they shoot at you or touch you, you have to start again. While not extremely difficult, there is another danger to watch out for. Other players will be doing the second mission, and they like to drag the Borg into the hallways where the coolant towers are. Inevitably they die and those extra Borg attack you. So keep an eye out for people dragging Borg around.
Power Plant: Power Hogs
Your mission is to reroute power in each control station. There are five different control stations. In each control station there are several consoles around the edges of the room and two in the middle. You only have to activate two of the consoles. Activating any of the consoles will cause two Borg drones to spawn.
There is definitely a trick here that works quite well. The two middle consoles can be activated from the back. Get behind the console as close as you can to the pillar in the middle of the room. You should not be interrupted by the Borg when they spawn. Just remember to kill the Borg as they spawn, that way you don’t end up dragging them all over the power plant.
Jula
Jula offers missions to the temple. The transporter pad is to the right of Jula. While you can reach this area by running all the way there it is not worth it. Take the transporter. As you will find out, I do not recommend doing either of the missions offered by Jula.
Temple: Preservation of Knowledge
The first step is to talk to the lead archaeologist at the temple. She explains that they are attempting to transport out the artifacts scattered around the area in crates. The problem is that they haven’t been labeled properly. Your mission is to label 12 artifacts then use the near by transporter console to signal for their beam up.
The first part is pretty easy, there are cargo boxes all around the edge of the area. Just walk up to them and label the contents. A word of warning here you MUST read the description of the box. There is a lot of text there, but you are scanning for a few keywords. The first question asks where it was found. There are three possible answers: the main dig, hillside, obelisk. The second question has a few more possibilities. The possible hazards are: Nadion radiation, Nanovirus purge, Polaric ion exposure, and Axonal amplifier exposure. Once you have answered both questions just pick it up for transport.
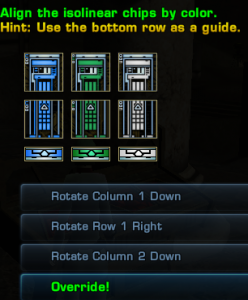
The problem is that you have to align the isolinear chips for each transport. That’s right 12 times. Now, I am sometimes a glutton for punishment. But in my worst nightmares I will find this puzzle. This is one of those things that the programmer thought was cute. There is no other explanation. Seriously, solve this puzzle 12 time in a row? Why? There is NOTHING fun about this puzzle. But seriously this is supposed to be the “easy” mission. So for easy lets do this puzzle 12 times in a row. After answering two questions twelve times in a row… Waiter check please!
Seriously, skip it. This thing is so bad that I am going to do a future post that has all the possible combination’s so you won’t have to sit through this ever again.
Can you tell I REALLY didn’t like this? Okay now that I have wasted almost 20 minutes sorting, gathering, and sliding isolinear chips around…
Temple: Higher Ground
This mission Use modified turrets to disable Borg shields, then defeat those Borg. While this sounds simple, it is not.
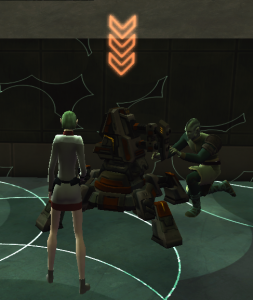
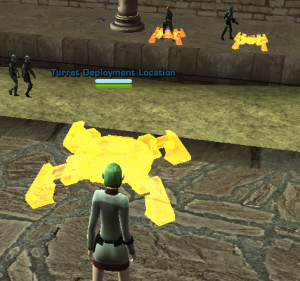
The Borg are traveling down a channel in the middle of the area. As you can see in the screen shot to the right, there are locations along the edge that you place the turrets.
Once the turret is placed it will fire at a Borg removing that Borg’s shield. But for some reason as soon as it removes the shield, the Borg shoots you. Why is that a problem you ask? The Borg stops moving forward. So there is no support in the area where you are shooting at this Borg. If you let the Borg go around to the end, there are 5 or 6 defenders that will obliterate the Borg for you.
Still don’t see the problem? They are tactical drones. That is right, the turret removes the shield on the toughest humanoid drone. Again just skip this. Takes way too much effort for basically no gain.
Conclusion
Quite a large variety of things you can do, however at the end of it all I learned something. Apparently, the best way to do this is to do 1 easy mission, 1 medium, 1 hard, and then the probe mission. So, the next time I will try to do some of the medium and hard missions so that I can do a post like this one. The probe mission appears to be where the large payout is in the form of equipment.
Also as a side note, for those of you following Luce Libera’s challenge she made a new grade during this event. On Stardate 89856.50 she was promoted to lieutenant commander (17). You can click challenge to see what it is all about. While editing this post, Luce Libera’s duty officers got a critical success on a wilderness survival training program. So as of Stardate 89856.77 she has increased in grade to lieutenant commander (18).
For those of you who are looking for the easiest of the missions so that you can just rush to probe, I would suggest the City: Automated Aggression mission. Technically, you don’t have to kill the drones. Just run up and upload the new software.

